When I first decided to trek to Everest Base Camp, the very first thing I did was book a ticket to Nepal—impulsive, yes, but sometimes that’s how the best adventures begin. Once the ticket was secured, I dove headfirst into reading every blog I could find and watching an endless stream of YouTube videos. I had nearly four months to prepare myself mentally and physically, but I’ll admit, the training didn’t always go as planned (I might have traveled more than trained during that time, but hey, positivity is key!). I found a local agency in Kathmandu, packed my bags, calculated my budget, and embarked on some training—though my real strength has always been my willpower.
In this post, I’ll share my personal experience of trekking to EBC, including a detailed budget breakdown, packing essentials, and crucial preparation tips. My goal is to inspire you to not only book that trip to Nepal but to prepare yourself in a way that minimizes stress and maximizes enjoyment. Whether you're a first-timer or a seasoned trekker, my journey will offer insights, tips, and a few laughs along the way to help you make the most of this incredible adventure.
Timing and Weather: Picking the Perfect Season
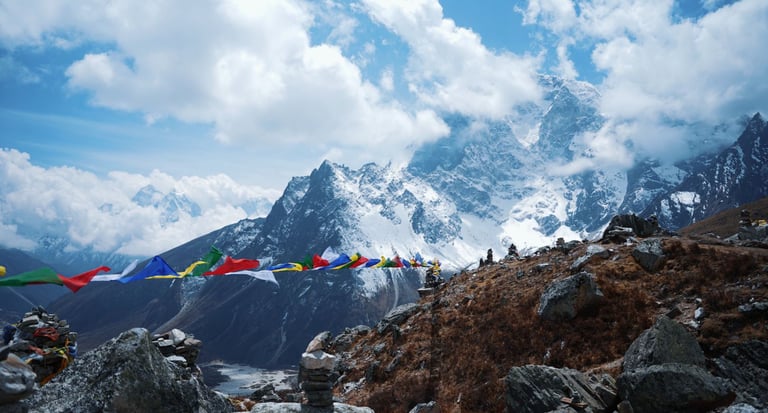
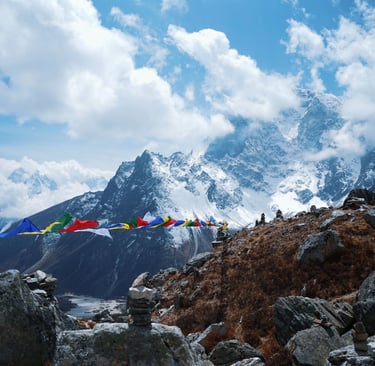
The best times to trek to Everest Base Camp (EBC) are during the peak seasons of October-November and April-May, when the Himalayas often reward you with clear skies and minimal rain. However, this is also when you’ll encounter the most trekkers on the trails—so be prepared for some crowding. My trek began on the 8th of April, and while the trails were busy at times, it was manageable and still an incredible experience. Keep in mind that EBC is one of the most popular treks in the world, so don’t be surprised to see large groups of people and to find that prices for agencies and supplies along the way are higher than you might expect.
If you choose to trek during the low season—December-March or June-September—it's crucial to prepare accordingly. Winter treks mean dealing with snow and freezing temperatures, which can be challenging but also offer a quieter, more serene experience. On the other hand, summer treks will bring lots of rain and, unfortunately, leeches. But for those who prefer solitude and don’t mind the extra challenges, these off-peak times can provide a unique and rewarding adventure.
No matter when you decide to go, proper preparation is key. Whether you're navigating the busy trails of peak season or braving the elements in the off-season, being well-prepared will ensure that your trek to EBC is a memorable one.
Budget Breakdown: Insurance
Travel insurance for EBC. When preparing for your Everest Base Camp trek, securing travel insurance is not just a recommendation—it's a necessity. I quickly realised this as I began searching for insurance options before my departure to Kathmandu. The first challenge was finding an insurance provider that covered emergency evacuation at altitudes over 5,000 meters, which is crucial for such a high-altitude trek.
Initially, I searched for agencies within my home country, Lithuania, but encountered difficulties. Some options were prohibitively expensive, while others simply didn’t offer the necessary coverage. After extensive research, I found Balcia Insurance, which was perfect for my needs as it had no altitude limits and costed me €190. I found this page offering insurance for many nationalities at similar price.
As I mentioned in my first blog post about trekking to EBC, doing your homework is absolutely essential. When planning such a significant journey, selecting the right agency can make all the difference in ensuring a smooth and enjoyable experience.
When searching for a trekking agency, it's important to look for one that offers a comprehensive package. Here's what you should aim to have included:
Pick-Up and Drop-Off: The agency should provide pick-up and drop-off services from the international airport in Kathmandu. This helps ease the stress of navigating a new city right from the start.
Accommodation: Your package should include your first and last nights' accommodation in Kathmandu, allowing you to start and end your trek with comfort and convenience.
Meals During Trekking: Look for an agency that includes all meals—breakfast, lunch, and dinner—during the trek. This ensures you're well-fed and focused on the adventure rather than logistics.
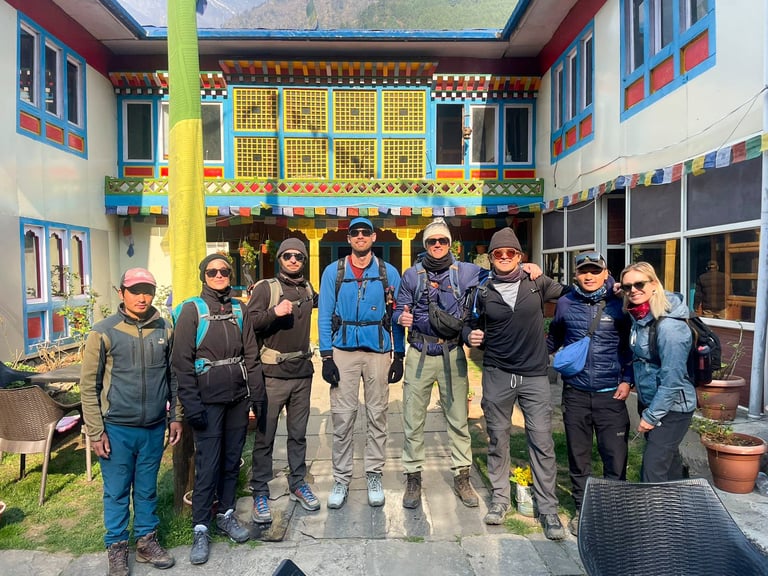
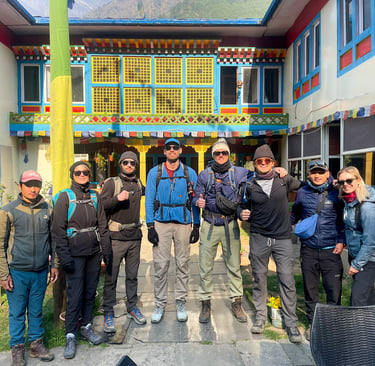
Guides and Assistance: Ensure the agency provides a licensed guide and an assistant guide, especially if your group has six or more members. A knowledgeable guide is crucial for both safety and making the most of your experience. During your trek, the main guide will be in front, and assistant - in a back. Usually I ended up last one in our group and it was very comfortable to know if something happens, he's got my back.
Necessary Permits and Paperwork: The agency should handle all the necessary permits and paperwork required for the trek. This can be a complex process, so it's a relief to have it managed professionally.
Trekking Gear: The package should include essential trekking gear like a duffle bag for the porter, a sleeping bag, a down jacket, and walking poles. These items are vital for your comfort and safety at high altitudes.
Airfare and Transportation: Your agency should cover the round-trip airfare between Kathmandu and Lukla, as well as any additional transportation to and from the trekking routes.
Supplementary Snacks and Fruits: A thoughtful agency will include supplementary snacks and fresh fruit as dessert every evening after dinner—small touches that can make a big difference in keeping your energy up.
Taxes and Expenses: Ensure that all government and local taxes, VAT, and official expenses are included in the package to avoid any surprise costs.
Luggage Storage: Free luggage storage in Kathmandu is a nice perk, allowing you to securely store any non-essential items while you're on the trek.
Medical Kits: Lastly, it's crucial that the agency provides a comprehensive medical kit, including "Diamox" for high-altitude sickness prevention. Having this on hand can be a literal lifesaver.
Additional expenses (not included in agency fee):
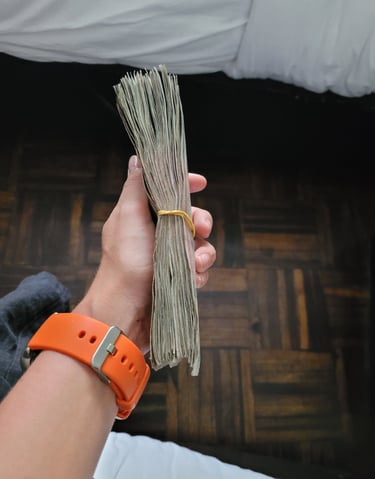
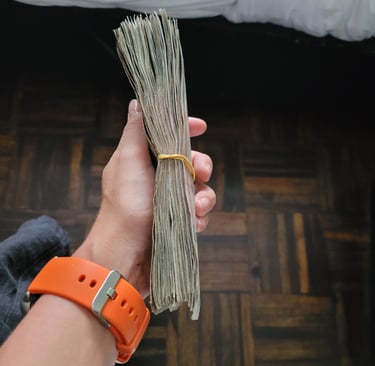
Tips for the guide and porter: It was a headache for us how much should we tip. Eventually we ended up by giving 10k NPR/€67 to the main guide (60k NPR/€405 from the group), 9k NPR/€60 to the assistant guide (54k/€365 NPR from the group), 5k NPR/€34 to my porter (30k NPR/€202 from the group). Next time I would do totally differently by not paying so much to the guides and paying much more to the porters.
Fee for the porter: I needed to pay extra for the porter, which costed me €70.
Tea/coffee: Usually hot drinks are not included in the offer so be prepare to pay extra. I drank 2 cups of ginger lemon tea per day (1 cup costs 150-250 NPR/€1-1.70). Sometimes I had coffee during breakfast (1 cup costs 150-250 NPR/€1-1.70).
Water: Use water bottles with filters or buy water purification tablets before your trek. Water purification tablets "Micropur Katadyn MF1T" costed me €22.50 for 75 tablets. Additionally I had drops to my water as well to clear the taste of purification tables, and it was a game changer (I used "Micropur" 10 ml which I bought in Lithuania), and it costed €10. But If you will choose to buy water (which I don't recommend as you will increase rubbish amount in the trek), you will pay from 300 to 700 NPR/€2-4.70 per litre. For 12 days you will spend around 15k NPR/€80.
Snacks: I brought everything from my home country but you can find all of it here in Thamel. I had 1 pack of the cashew nuts, 1 pack of dry pineapple, 8 bars of Snickers/Bounty, 3 dark chocolate bars. Eventually I started sharing these sweets with my group. Expenses: around €25.
Wifi and hot shower: I bought wifi only 2 times. At Namche Bazzar it costed 500 NPR/€3.40. Pro tip: go to the "Hermann Helmers" bakery for free Wifi and charging, and of course delicious cakes. And in Dingboche I bought Wifi accesses for 24 hours and it costed 800 NPR/€5.40. I didn't use hot shower during my trekking as I used wet wipes. But it will cost you from 500 to 1000 NPR/€3.40-6.70.
Wet wipes/toilet paper: I brought 2 packs of wet wipes for my cleaning routine - €16. 2 packs of safe to flush wet napkins - €5. 2 packs of antibacterial wet napkins - €3. 1 disinfection fluid which I didn't use - €2.50. Toilet paper will cost you around 100 NPR/€0.70.
Charging: I didn't need to pay for an electricity anywhere as I charged my phone and power banks everyone I could and going higher I rely on my power banks. But some places take extra fee for it and it may cost you around 500-1000 NPR/€3.40-6.70.
Packing Essentials
When you're preparing to trek to EBC, packing the right gear is crucial. Many experienced hikers will tell you that striking a balance between over-packing and missing essentials is key. Too much weight on your back (or your porter's) can slow you down, but missing critical items could make your trek uncomfortable or unsafe.
Before anything, your focus should be on lightweight, moisture-wicking, and warm clothing, along with durable gear that can withstand the tough Himalayan conditions.
Clothing:
Base Layers: You’ll need both light and warm base layers for different temperatures. Opt for moisture-wicking material like merino wool.
Mid Layers: A fleece jacket or sweater is essential for cooler temperatures.
Outer Layers: A down jacket is crucial for cold evenings at high altitudes. Make sure it's lightweight and packable.
Waterproof Jacket and Pants: Sudden rainstorms or snow can happen, so bring a high-quality waterproof layer.
Trekking Pants: Convertible pants are great for layering and versatility.
Hiking Boots: Break them in well before the trek to avoid blisters. 1 trekked with Salamon.
Socks: Wool socks are essential for warmth and comfort. I had 5 pairs of trekking socks and 1 warm socks to wear at the tea houses.
Hat, Gloves, and Buff: For warmth and protection from the cold, sun and wind. It's a recommendation to wear hat all the time for not getting an altitude sickness as well.
Sunglasses. Choose high-quality sunglasses that protect your eyes from intense UV rays, strong winds, and glare from snow-covered peaks.
Light slippers. You want to give your feet a good deserved brake of your trekking shoes in the tea houses. And if you will take shower, you definitely need ones.
Light clothes for tea houses. I packed leggings and t-shirt just only for time in the tea houses.
Gear:
Backpack (Day Pack): Around 25-30 liters for carrying daily essentials like water, snacks, and extra layers. I had 20/25l backpack and it weighted around 8-10 kg. I always carried 2 liters of water.
Trekking Poles: Helpful for stability, especially on uneven trails. I trekked without poles but I wish I had ones at Kala Patthar hike.
Sunscreen and Lip Balm: The high-altitude sun is intense, and you'll need extra protection.
Power Banks: Charging your devices may cost extra in tea houses, and outlets may not always be available. My EU standard worked well.at
Health and Safety Items:
First Aid Kit: Include band-aids, blister treatment, antiseptic wipes, and pain relievers.
Diamox (for altitude sickness): Your guide will have this medicine for you but you can have your own just in case.
Wet Wipes and Hand Sanitiser: I used wet wipes instead shower. I didn't want to get cold and I saved extra money.
Toilet Paper: Bring your own as it’s not always available in remote areas. And always have it in your backpack.
How Much Money to Bring
Lesson 1. One of the biggest lessons I learned on my journey to Everest Base Camp is that this trek is undeniably commercialised. From the moment you step onto the trail, you’ll notice that everything is designed with tourists in mind—from the perfectly positioned teahouses to the souvenir shops selling everything from prayer flags to bottled water. Authenticity can sometimes feel like it’s taken a back seat to the hustle of making a quick buck.
However, that’s not to say the experience is diminished. In fact, understanding this commercialisation gives you a unique perspective. Yes, many of the local businesses are catering to tourists, but at the same time, they’re providing much-needed services and supporting the local economy in a region where opportunities can be scarce. It’s a delicate balance between authenticity and necessity.
Lesson 2. This is a lesson I learned only after the fact: we overtipped our guides and undertipped our porters. The reality is, porters don’t earn much from the agencies, and their trekking conditions—sleeping, eating—are far from comfortable. The harsh truth is that some guides even get extra money from the teahouses. For example, if you buy Wi-Fi or pay for a shower, 50% of that might go into their pocket.
Lesson 3. Another important lesson: don’t approach the trek with the mindset that you're there to "help" local businesses. Yes, it's great to support them, but don’t be afraid to respectfully negotiate prices. People in the mountains live simply, but that doesn’t mean they don’t have the same—or even more—savings than you. It's all part of the local culture, and bargaining is expected!
Journey
Exploring life, culture, and nature in Nepal.
Inspire
Copyright © 2024 kchaworld. All rights reserved.