Langtang Valley - Gosaikunda Trek: Everything You Need To Know
TREKKING IN NEPAL
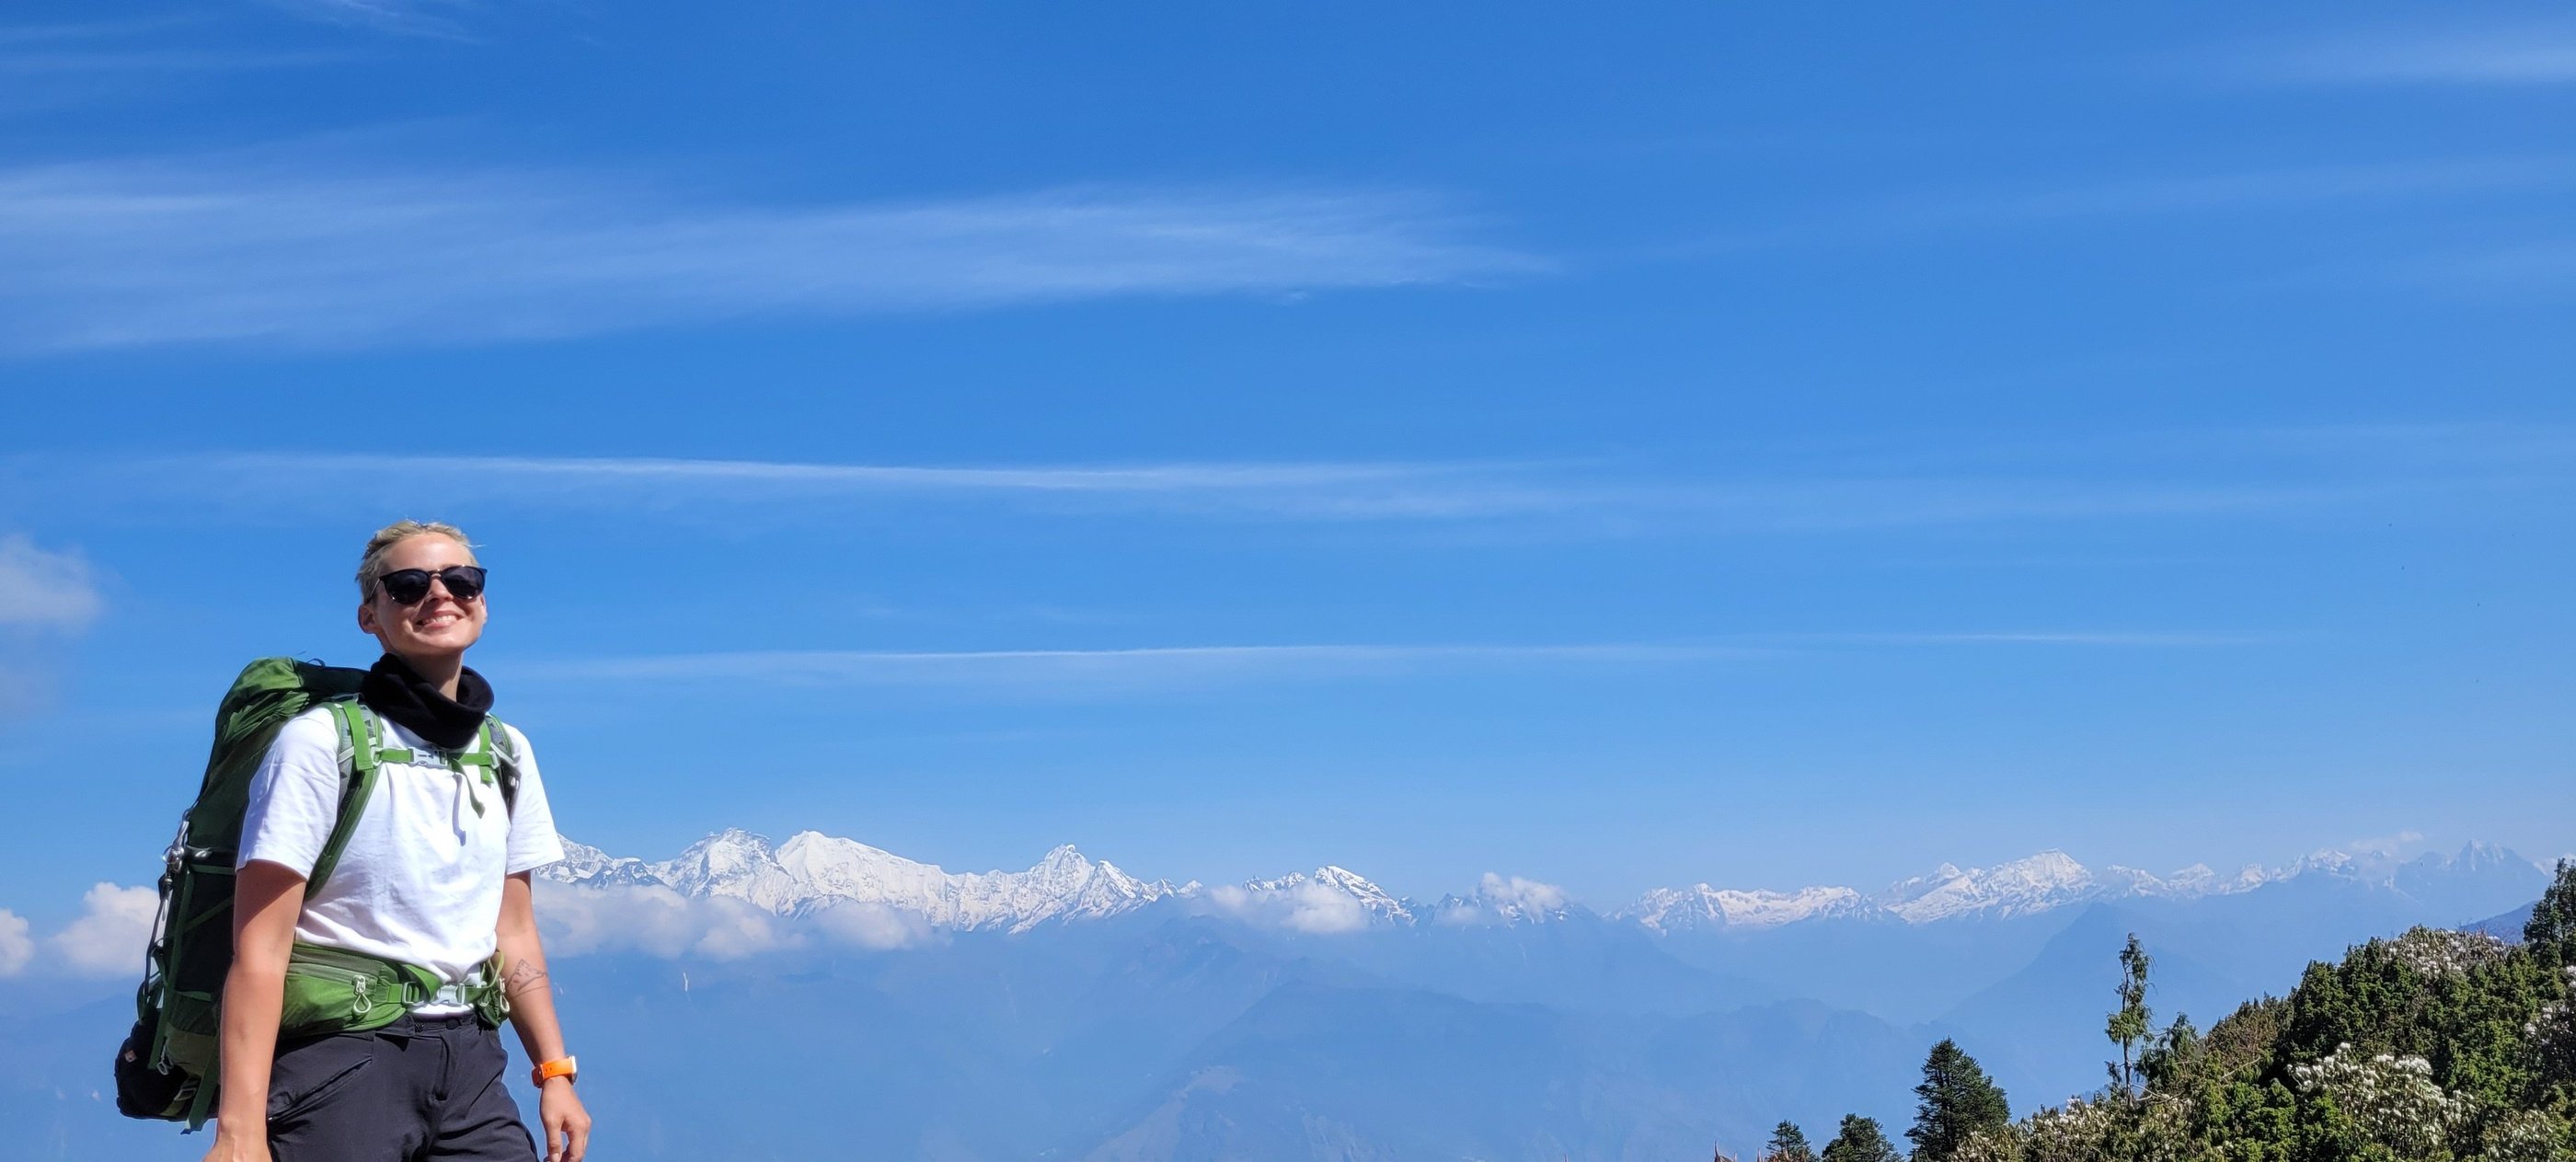
After completing the Everest Base Camp trek, exploring the safari, and spending time in Pokhara, I decided to extend my stay in Nepal for one more month... and then another. The reason? I fell in love—not just with the Himalayas, but with my future husband. By the time you read this, we’re already married, and I now live in Nepal permanently. One day, I’ll write about that romantic story, but for now, let’s focus on another stunning adventure: the Langtang Valley - Gosaikunda trek.
Why Langtang?
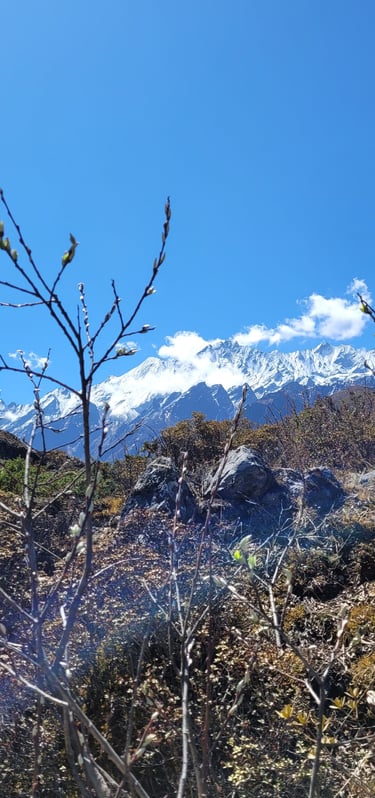
The Langtang Valley trek is a gem among Nepal's trekking routes, and it’s especially great if you're looking for a shorter, less crowded trek compared to Everest Base Camp. We trekked in the middle of May, and while EBC was bustling, Langtang felt almost deserted. There were only a few trekkers, giving us a more intimate experience with nature.
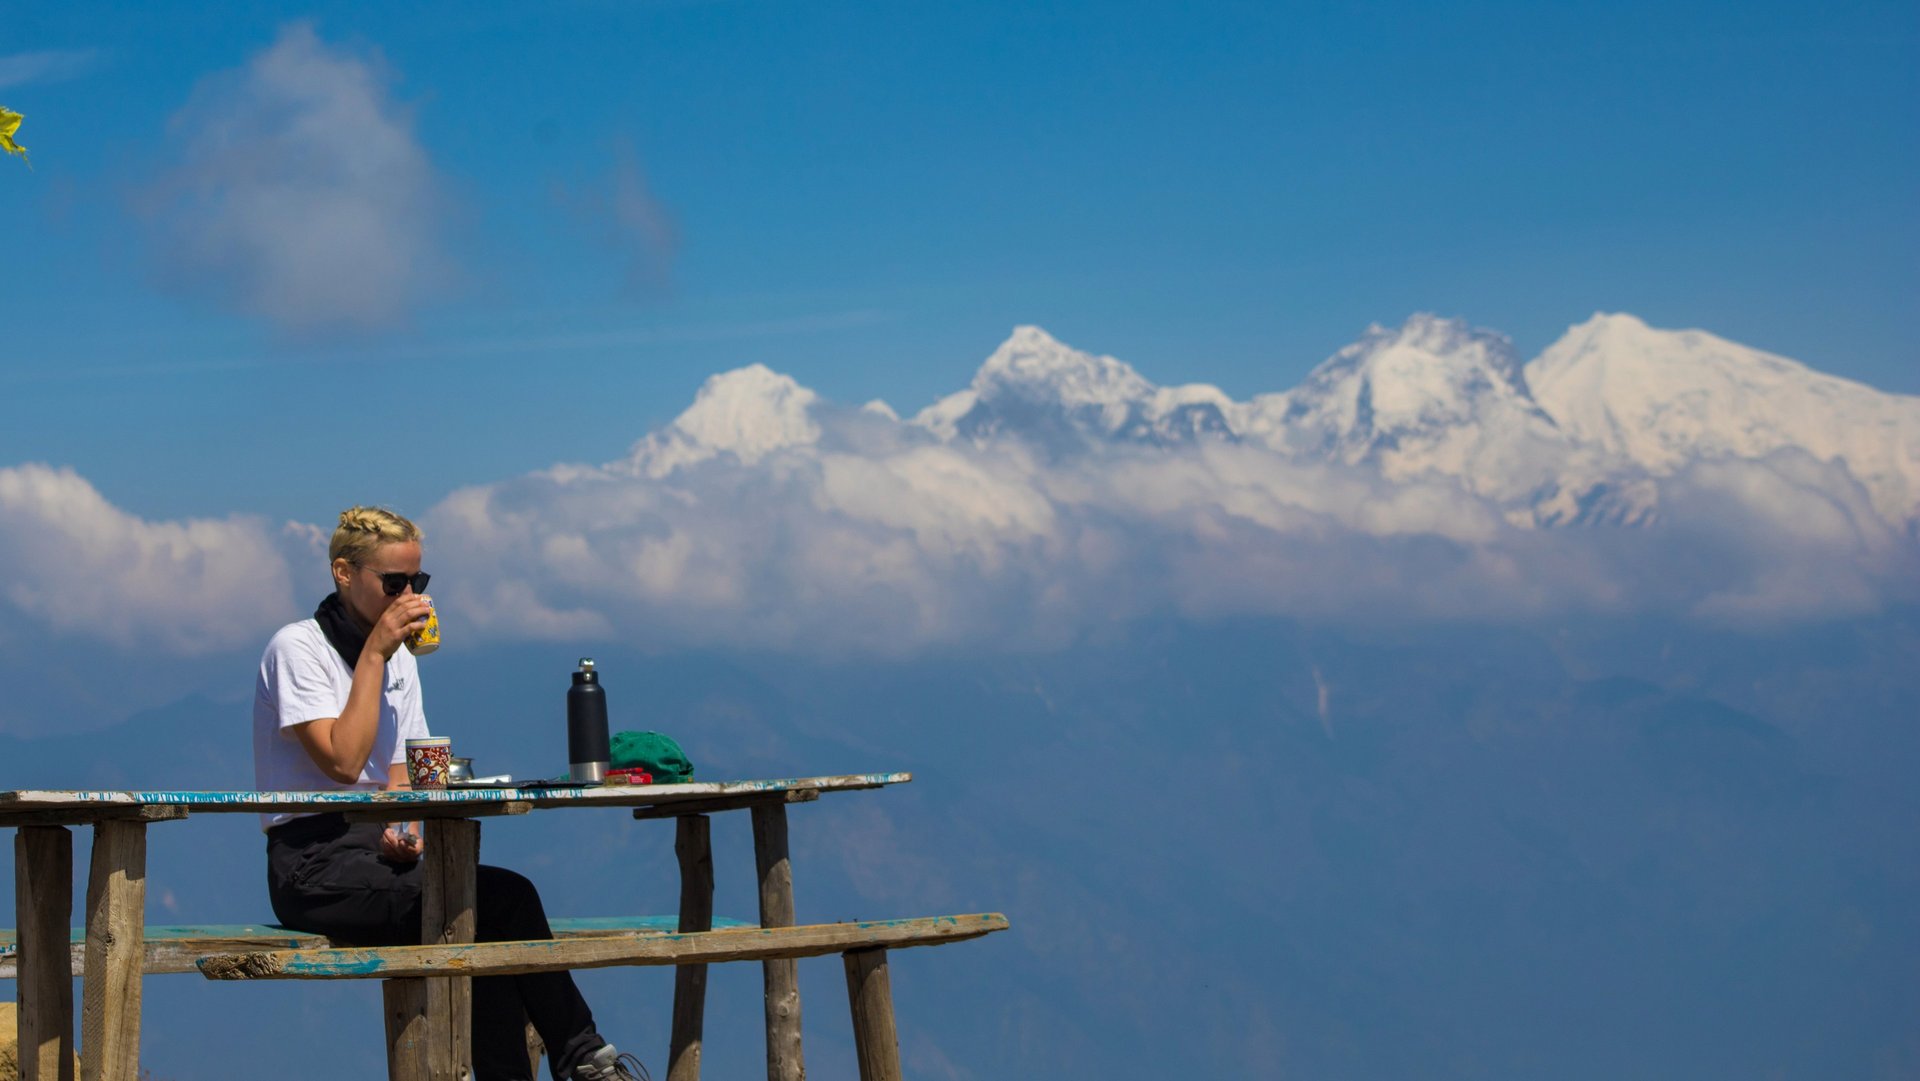
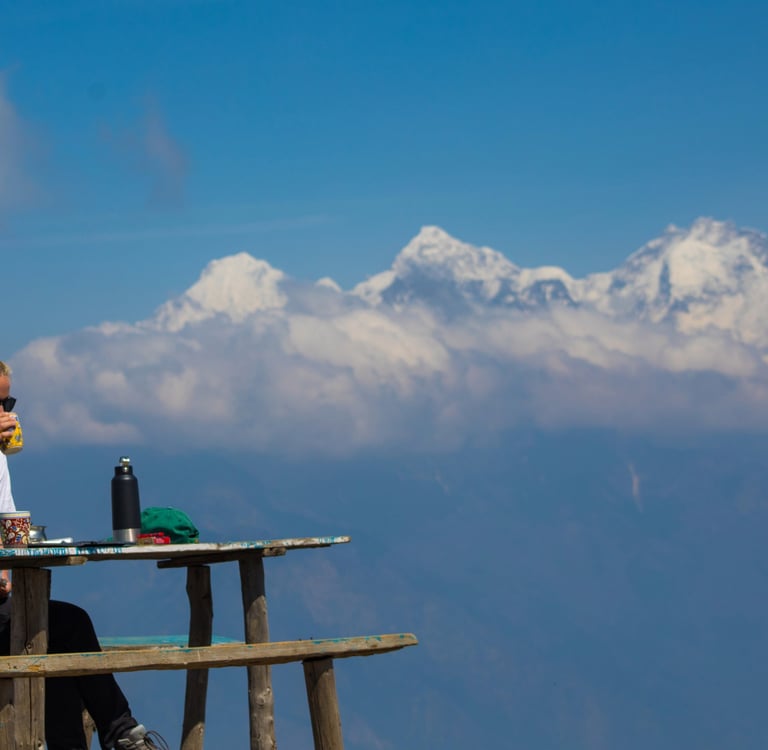
Like many Himalayan treks, the best time to go is during the spring (March to May) or autumn (September to November). In mid-May, we mostly enjoyed clear, sunny skies, except for few rainy days. We were also fortunate not to be stuck at Kyanjin Gompa due to clouds, unlike some fellow trekkers who missed the summit views. And trust me, you want to see those views!
The beauty of the Langtang trek is its flexibility. If you’re feeling energetic and want to see more, extending the trek through Gosaikunda is a perfect option. The entire trek can be adjusted to your pace, so whether you want a more leisurely hike or a challenging adventure, the Langtang region has something to offer.
For us, adding Gosaikunda to the trek was a way to blend natural beauty with spiritual discovery. The route gave us the chance to connect not only with nature but also with local trekkers and pilgrims, enriching our journey even more.
While the Langtang trek is generally beginner-friendly, the Gosaikunda extension does present some challenges, especially as you near the lake at 4,380 meters (14,370 feet). The elevation and unpredictable weather can make it tough, so it’s essential to be prepared. I recommend carrying a good rain jacket and plenty of warm layers, as the weather changes quickly at higher altitudes.
Despite the fog, trekking to Gosaikunda remains one of the highlights of my hiking adventures in Nepal. It’s a trek that challenges you physically, but also fills your soul with awe and inspiration.
Difficulty and Altitude
Langtang Valley is a good trek for beginners, but don’t take it too lightly. The first day is the toughest, with steep climbs and a long day ahead of you. The highest point on the trek is Kyanjin Ri (4,773m) or Tserko Ri (5,033m), and if you're feeling adventurous, you can even climb Yala Peak at 5,500m (prior preparation is needed).
Although acclimatisation days aren’t as common on this trek, always listen to your body. If you feel symptoms like headaches, nausea, or fever, stay put or descend. For altitude sickness, pack some Diamox just in case. Having done Everest Base Camp, I didn’t have any altitude issues on this trek, but it’s always better to be cautious.
Do You Need a Guide?
The short answer is no. You don’t need to hire a guide for Langtang Valley or Gosaikunda unless you want extra support or hike to Yala Peak. There’s some misinformation floating around saying you must have a licensed guide, but that's just speculation. What you do need is a permit for Langtang National Park, it's the same permit for Gosaikunda as well. You can get it in Kathmandu, and don’t forget to bring two passport-sized photo.
This time, I didn’t hire a porter like I did for EBC. Instead, I bought a bigger backpack and carried everything myself (well my husband took some weight too). While the difference was obvious (hello, sore shoulders!), I quickly got used to it. Pro tip: pack light. You can check my packing list here, and adjust it for this shorter trek.
Langtang and Gosaikunda is an easy-to-navigate, safe trek. The trails are well-marked, and locals are always happy to point you in the right direction.
Quick Navigation:
DAY 1: Kathmandu to Syabrubesi
Elevation at Syabrubesi: 1,460 meters (4,790 feet)
Duration by bus: around 7 hours
The cheapest way to get to Syabrubesi is by bus, which costs around 900 NPR (about €6). Brace yourself for a bumpy and dusty ride, but that’s part of the fun! You’ll be surrounded by locals, listening to Nepali music, and maybe even treated to some live tunes from the local boys. I personally enjoy these bus rides—who needs comfort when you can have an adventure?
If you're not up for a long bus ride, you can hire a jeep for around €100 per person, but it’s best to find others to split the cost.
Syabrubesi is a small village with a few options for accommodation. There are also some shops if you forgot to pick something up in Kathmandu.
DAY 2: Syabrubesi to Lama Hotel
This is one of the hardest days, so take it slow. You’ll pass through scenic landscapes, forests, and cross a few suspension bridges over the Langtang River. There are some road construction areas, but don’t worry, they’re short-lived. The challenge lies in the steep ascent and dreaded steps—ugh, steps.
Take a lunch brake at Bamboo. You will enjoy your meal by listening sounds of the river and if you will be lucky, you can spot some monkeys.
Lama Hotel is a small settlement with only a handful of tea houses. We stayed in the first one on the left, and the owners were incredibly friendly. Be sure to charge all your devices in Syabrubesi, because electricity here is scarce. There’s no Wi-Fi either, but there is a hot shower (the last one you’ll get for a while).
Elevation at Syabrubesi: 1,460 meters (4,790 feet)
Elevation at Lama Hotel: 2,480 meters (8,136 feet)
Elevation Loss: 1,020 meters (3,346 feet)
Distance: 11,3 km (7 miles)
DAY 3: Lama Hotel to Langtang Valley
Elevation at Lama Hotel: 2,480 meters (8,136 feet)
Elevation at Langtang Valley: 3,430 meters (11,253 feet)
Elevation Loss: 950 meters (3,116 feet)
Distance: 14,7 km (9,1 miles)
After a good night’s rest at Lama Hotel, you’ll continue trekking uphill, and this is where the scenery really starts to take your breath away. As you ascend, the landscape opens up, revealing stunning mountain views and glimpses of the majestic Langtang Valley. Along the way, you’ll pass through charming villages that have been slowly rebuilt after the devastating 2015 earthquake. I highly encourage you to take a moment to talk with the locals. Hearing their stories of loss, resilience, and rebuilding is both humbling and inspiring. It’s remarkable to see how much has been restored, including the tea houses that now stand strong amidst the mountains.
As we made our way toward Langtang, we were greeted by a sudden downpour. After a hard rain shower, we took refuge at a small tea house Ghoda Tabela, warming ourselves with some hot tea. This stop also doubles as a checkpoint where your permits will be reviewed, so make sure you have them handy. Here, we met a friendly Australian couple and a German guy. They told us how they had been stuck at Kyanjin Gompa for three days, as the mountains were shrouded in thick clouds, preventing them from hiking up to Kyanjin Ri. Despite their delays, they remained in good spirits, and so did we—somehow, we knew we’d get lucky with the weather.
After enjoying a warm lunch, we continued our trek toward Langtang Valley. The trail here is a bit more forgiving, allowing you to soak in the scenery at a leisurely pace. We arrived in the valley by late afternoon and settled into a cozy lodge. The hospitality was as warm as the delicious home-cooked meals, and sitting around the stove with other trekkers made for a perfect evening. There’s something about being in the heart of the Himalayas, surrounded by towering peaks and good company, that fills you with gratitude.
Trust me, even a little rain can’t dampen the magic of Langtang Valley.
DAY 4: Langtang Valley to Kyanjin Gompa
Elevation at Langtang Valley: 3,430 meters (11,253 feet)
Elevation at Kyanjin Gompa: 3,870 meters (12,696 feet)
Elevation Loss: 440 meters (1,443 feet)
Distance: 5,7 km (3,5 miles)
This is the shortest day of the trek, taking only about three hours. Don’t rush it—savor the views and stop for a hot drink at the legendary "Hard Rock Cafe" (not that Hard Rock Cafe, but it’s famous on the trail!).
Once in Kyanjin Gompa, if you’re still feeling energetic, you can do an extra hike to the nearby glacier. Just be careful and keep your distance from any wild yaks. They’re not as used to people as the yaks on the Everest trek! And keep away from the landslide area which is on the right of the small river. You have to cross it and walk on the left side of the river towards glacier.
The another short hike option is to the view point of the glacier lake, which will take 2 hours both ways.
DAY 5: Kyanjin Gompa to Kyanjin Ri Lower Peak to Lama Hotel
Elevation at Kyanjin Gompa: 3,870 meters (12,696 feet)
Elevation at Kyanjin Ri Lower Peak: 4,360 meters (14,304 feet)
Elevation at Lama Hotel: 2,480 meters (8,136 feet)
Elevation Loss: 1,880 meters (6,168 feet)
Distance: 27 km (16,7 miles)
We didn’t want to take any chances with the weather, so we set our alarms for 4 am and started our ascent to Kyanjin Ri Lower Peak before the clouds had a chance to roll in. The early wake-up call was tough, but completely worth it. If you're not in a rush, I’d highly recommend spending an extra night at Kyanjin Gompa to give yourself time to hike to the higher peak. If this is your only trek in Nepal, trust me, you won’t regret going the extra distance. There’s something incredibly rewarding about pushing your limits and standing on the highest peaks, knowing you've earned every step.
The early morning trek was peaceful and quiet. We had the trail to ourselves, with the only sound being the crunch of our boots on the rocky path and the occasional gust of mountain air. Watching the mountains slowly awaken as the sun crept over the peaks was a breathtaking sight—one of those rare moments when you feel completely connected to nature. If you're doing this hike, make sure to leave your heavy backpack at your tea house. Just take water, some snacks, and perhaps a camera to capture the stunning views.
The climb to Kyanjin Ri Lower Peak is a bit of a challenge, but that’s what makes the summit so satisfying. Take your time, move slowly, and don’t hesitate to take breaks whenever you need. Trekking poles are a lifesaver on this route—not just for the climb up, but especially for the descent. The path can be rocky and slippery in parts, so it's best to be prepared.
When we finally reached the peak, we were greeted by clear skies and brilliant sunshine. Even though the weather was perfect, having a down jacket on hand was a smart move as the wind at this altitude can still bite. We sat down for a well-deserved breakfast, which we’d packed the night before, and soaked in the panoramic views of the Himalayas. There's something magical about watching the colors of the mountains shift as the sun rises higher in the sky—it's a view that will stay with you forever.

After a short break, we started our descent, making good time on the way down. It was much easier going downhill, and we found ourselves enjoying the changing landscape with every step. The trek back to Lama Hotel is long, but the sense of accomplishment and the beauty surrounding you will keep you going. The day ends with the satisfaction of having reached one of the most spectacular viewpoints in the Langtang region and the joy of returning to the cozy warmth of a tea house after a long, rewarding day.
DAY 6: Lama Hotel to Thulo Syabru
Elevation at Lama Hotel: 2,480 meters (8,136 feet)
Elevation at Thulo Syabru: 2,210 meters (7,250 feet)
Elevation Loss: 270 meters (886 feet)
Distance: 7,1 km (4,4 miles)
After a hearty breakfast at Lama Hotel, you'll begin your descent down the familiar trail to Pairo. This part of the trek is relatively straightforward, but don’t let the easy path lull you into a false sense of security. Case in point: I managed to lose my balance and fall straight into a pile of donkey dung! While it gave us all a good laugh, it was a reminder to stay focused on the trail—keep an eye on where you’re stepping, especially with so many donkeys sharing the path. A trekking experience wouldn't be complete without some comical mishap, right?
We took a coffee break at Bamboo, savoring the peacefulness of the morning before continuing our descent. After about an hour of steady walking, we reached a huge yellow sign that marked our junction towards Gosaikunda. From here, things take a different turn—literally and figuratively—as the trail begins to ascend again.
Prepare yourself for a bit of a climb, as the path ahead is mostly uphill and paved with cement in several sections. It’s not the most scenic part of the trek, but the workout will certainly keep you warm! After about 45 minutes of steady climbing, we reached a nice spot for a break, which quickly turned into a well-deserved lunch. Nothing boosts your morale like refueling with some dal bhat or a warm noodle soup in the mountains!
With renewed energy, we set off again, crossing one more suspension bridge—a quintessential part of any trekking adventure in Nepal. The final leg of the day’s journey took us around two more hours before we arrived in Thulo Syabru. This village offers a range of tea houses, but be aware that depending on the season, some of them might be closed. We were lucky to find a cozy place to stay despite a few closures, which made for a restful night after another beautiful day on the trail.
Trekking days like this remind you to take things as they come—donkey mishaps included! It’s all part of the adventure, and the small challenges make the incredible views and experiences even more rewarding.
DAY 7: Thulo Syabru to Cholangpati
Elevation at Thulo Syabru: 2,210 meters (7,250 feet)
Elevation at Cholangpati: 3,654 meters (11,988 feet)
Elevation Loss: 1,444 meters (4,737 feet)
Distance: 9,5 km (5,9 miles)
As you leave Thulo Syabru, the trail immediately begins with a steep ascent. You’ll feel the elevation increase fairly quickly, and the first hour or so will test your stamina. Make sure to pace yourself, especially if this is one of your first high-altitude treks. The ascent can be challenging, but it's rewarding as you steadily rise above the valley.
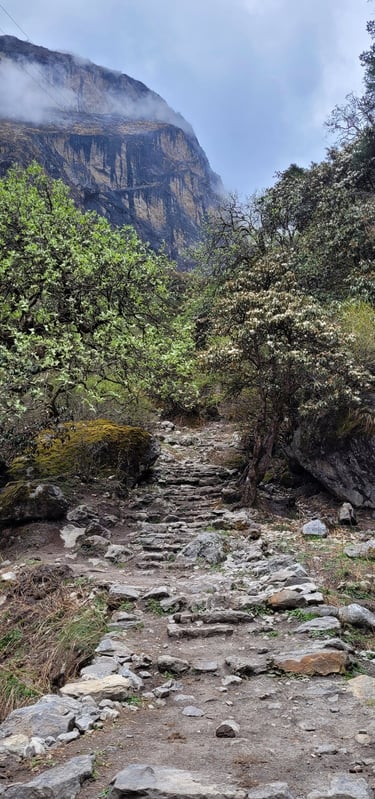
The route primarily winds through dense forests of rhododendron, oak, and bamboo. In the spring, the rhododendron trees come alive with bursts of color, making the trek particularly beautiful. The forest feels quiet and serene, with birds chirping and occasional wildlife sightings (keep an eye out for the elusive red panda or langur monkeys). The shade from the trees provides a nice respite as the climb intensifies.
Along the way, you’ll pass through small villages, where you can stop for a break, grab some tea, and chat with locals. The trail remains steep in sections but offers stunning views of the surrounding hills and distant peaks, providing motivation to keep pushing forward.
As you continue towards Cholangpati, the altitude gain becomes more apparent. Breathing will be noticeably more difficult, and you’ll feel the effects of the thinner air, especially if you haven’t acclimatised properly. Take your time, drink plenty of water, and listen to your body—if you're feeling light-headed or dizzy, don’t hesitate to rest. We took plenty of breaks this time—it was a scorching day, and we had the company of two local dogs who, without any complaints, "escorted" us all the way to Gosaikunda like loyal trekking guides.
The ascent remains steep and continuous, with several zigzag paths through forests. Trekking poles are highly recommended here to support your knees, especially as the rocky paths can get slippery, particularly in wet conditions.
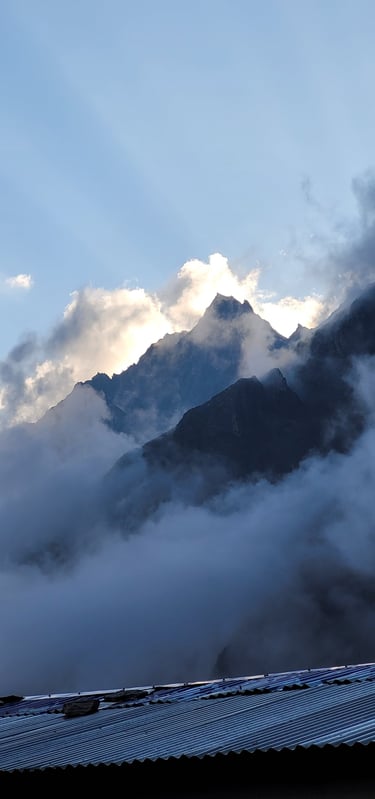
Upon reaching Cholangpati, you’ll be greeted by a charming cluster of two tea houses nestled against the backdrop of the Langtang Range.
These simple yet welcoming lodges offer much-needed food, shelter, and, if you're lucky, spectacular views of peaks like Ganesh Himal and Langtang Lirung on clear days. Cholangpati serves as a popular stopping point for trekkers en route to Gosaikunda, providing an ideal spot to rest and acclimatise before tackling the higher altitudes. Or the rescue place for those who got altitude sickens and don't listen their bodies.
Originally, we planned to stop just for lunch and push onward towards Laurebina, but the calm, peaceful weather had other plans. The afternoon was so serene, that we decided to stay the night. There’s something magical about soaking in the quiet beauty of the mountains with nothing but the fading sunlight for company—sometimes, slowing down and savoring the moment is the best decision you can make.
DAY 8: Cholangpati to Gosaikunda
Elevation at Cholangpati: 3,654 meters (11,988 feet)
Elevation at Gosaikunda: 4,380 meters (14,620 feet)
Elevation Loss: 726 meters (2,382 feet)
Distance: 5,1 km (3,17 miles)
As you leave Cholangpati, the trail begins with a steady uphill climb through rugged alpine terrain. You’ll start to notice the forest thinning, and soon the lush greenery is replaced by barren landscapes dotted with rhododendron bushes and rocky outcrops. Don’t be surprised if you feel the altitude—it’s normal for trekkers to slow down as oxygen levels drop. The trick is to pace yourself, take short breaks, and stay hydrated. Trekking poles become your best friend at this stage, especially when navigating the steep, sometimes slippery paths.
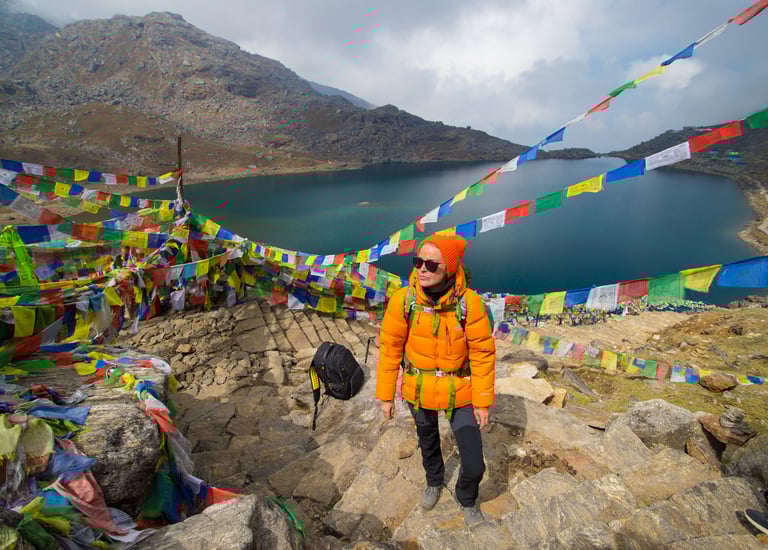
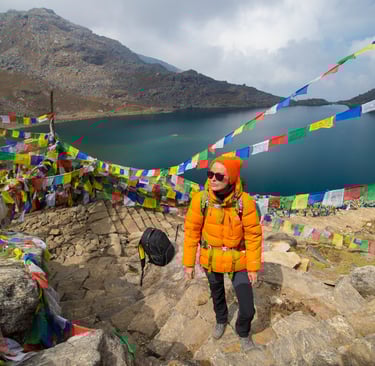
As you climb higher, the views open up, offering panoramic vistas of snow-capped peaks that seem close enough to touch. Every step brings you closer to Gosaikunda, a place steeped in both natural beauty and spiritual significance. When we reached the top, despite the altitude and the chilly air, we couldn’t help but feel a sense of awe and accomplishment.
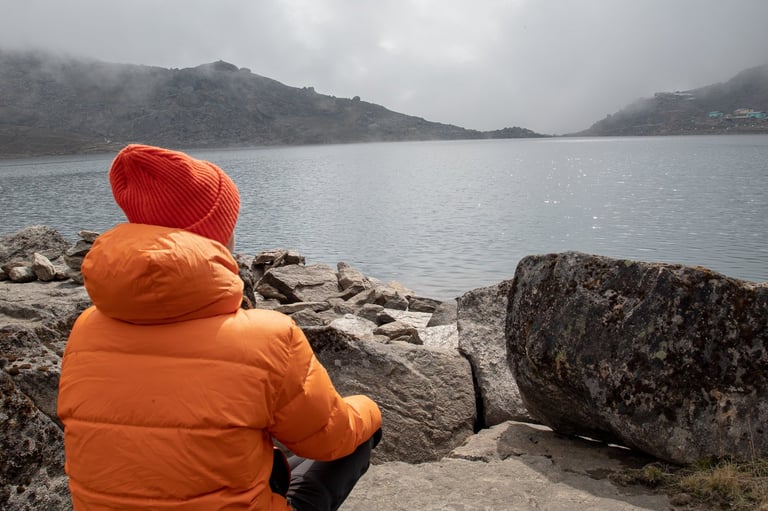
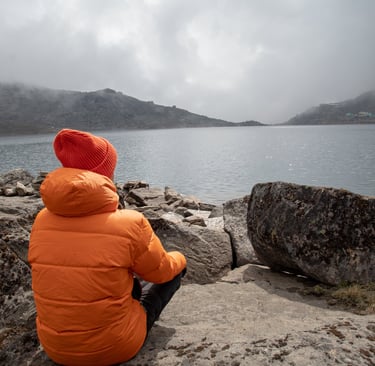
After hours of steep climbing, we reached the lake, and weather here was unpredictable, but the sight of the lake, framed by towering mountains, was awe-inspiring. Even though the wind was biting, it was impossible not to feel a deep sense of calm and fulfilment after such a long, strenuous trek.
In typical fashion, we took a moment to just sit by the lake, taking in the serenity. The silence here is profound, broken only by the occasional prayer flag fluttering in the wind or the murmurs of fellow trekkers paying their respects.
The Sacred Story of Gosaikunda
Gosaikunda is not just another beautiful Himalayan lake—it’s a site of immense religious importance, particularly for Hindus.
According to Hindu mythology, Gosaikunda is believed to have been created by Lord Shiva. The legend says that during the churning of the ocean, a poison called "Halahala" emerged, threatening to destroy the world. To save the universe, Shiva drank the poison, which burned his throat. In desperate need of relief, he struck his trident (trishul) into the ground, forming the Gosaikunda Lake to cool down the poison’s effects. The lake is said to be infused with his spiritual energy, making it a sacred pilgrimage site.
The lake holds deep significance for Hindus, especially during the annual festival of Janai Purnima, which takes place in August. Thousands of pilgrims, many trekking barefoot, make their way to Gosaikunda to bathe in the holy waters. It is believed that taking a dip in the lake cleanses one of sins and brings spiritual purification. Devotees also perform a range of rituals, including prayers and offerings of flowers, rice, and other symbolic items to honor Lord Shiva. Some pilgrims will even collect the lake’s water to bring back to their homes for blessings.
What struck me most was witnessing these rituals in such an ethereal, remote place. It’s not just about the physical challenge of the trek—it’s also about the deeply spiritual journey that so many undertake here. Even if you're not religious, the atmosphere at Gosaikunda is charged with a sense of reverence and devotion that’s hard not to feel.
DAY 9: Gosaikunda to Ghopte via Laurebina Pass
Elevation at Gosaikunda: 4,380 meters (14,620 feet)
Elevation at Laurebina Pass: 4,610 meters (15,115 feet)
Elevation at Ghopte: 3,530 meters (11,265 feet)
Elevation Loss: 850 meters (2,789 feet)
Distance: 8 km (4,97 miles)
Day 9 started with a crisp, early morning at Gosaikunda. We woke up earlier as usual, hoping to honor the spiritual significance of the lake with a ritual. The original plan was to take a full dip into the sacred waters, as it’s believed that doing so purifies the soul. But when we dipped our toes into the ice-cold water, we quickly realized that a full-body plunge was too ambitious—especially at those temperatures! Instead, we opted for a symbolic cleansing by washing our faces and feet, followed by a quiet moment at the temple nearby. The local priest even captured the moment on video for us, turning it into a meaningful memory.
After a quick but hearty breakfast, we set off towards Laurebina Pass. The weather decided to keep us guessing, with fog and clouds rolling in shortly after we began the ascent. Despite the lack of clear views, the atmosphere felt mystical, as if the mountains themselves were cloaked in mystery.
Laurebina Pass, standing at 4,610 meters, marks the highest point of the day. Though we couldn’t see much due to the fog, reaching the pass felt like an accomplishment in itself. The descent, however, was a different story. After the pass, the trek becomes a steep downward journey, and it was quite a workout for the knees. For anyone attempting this part, trekking poles are a must—they really take the strain off your legs, especially on rocky and slippery paths.
By the time we reached Ghopte, our knees were aching, and the fog hadn’t lifted, but there was still a sense of satisfaction. Despite the unpredictable weather, the experience of crossing the pass felt rewarding. It was as if the fog made the journey feel more personal, like the mountains were guiding us in their own quiet way.
DAY 10: Ghopte to Kutumsang
Elevation at Ghopte: 3,530 meters (11,265 feet)
Elevation at Kutumsang: 2,470 meters (8,104 feet)
Elevation Loss: 1,060 meters (3,478 feet)
Distance: 15,9 km (9,9 miles)


We kicked off our final trekking day with an unexpected breakfast treat: apple pie. A delicious fuel for the journey ahead! The morning was frosty, and from the look of the sky, it didn’t seem like clear weather would be in our favor. But hey, that’s trekking in the Himalayas for you—always full of surprises.
The trail from Ghopte to Kutumsang is mostly downhill, though there are a few uphill sections that will remind your legs they’ve been working hard for days. Despite the freezing start, we found ourselves trudging through a mix of rain and snow as the day progressed. Now, I know not everyone enjoys the sound of crunching snow beneath their boots, but I personally love it—it’s one of those little joys of winter trekking.
The day’s trek wasn’t particularly challenging, especially compared to previous days. But with the added layer of snow and rain, it became more of a serene, contemplative walk. It was as if nature was giving us a gentle farewell as we approached the end of our adventure. Don't forget to check your permit before entering Kutumsang.
By the time we reached Kutumsang, soaked but satisfied, we celebrated our journey the best way we knew how—with a pint of beer! (Trekking rule: no beer during the hike, but after? Definitely!). There’s something about that first sip after a long trek—it tastes like achievement.
Kutumsang also marked the return of reliable phone signal, and I finally got to call my family. Sharing the excitement and stories with them felt like the perfect way to close this chapter of the trek. One dream that’s stuck with me is to bring my parents here one day. I hope I can walk these trails with them before it’s too late—maybe even bribe them with some of that famous apple pie!
DAY 11: Kutumsang to Kathmandu
After days of trekking through the rugged beauty of the Langtang and Gosaikunda regions, it’s finally time to bid farewell to the mountains and make your way back to the hustle and bustle of Kathmandu. The journey from Kutumsang to the capital is a whole different adventure in itself—one that involves a bumpy, winding bus ride through the scenic foothills of Nepal.
You’ll start your day by catching a local bus from Kutumsang. Expect a mix of locals and fellow trekkers, chickens perhaps. Don’t be surprised if the bus feels like it’s packed beyond capacity—it’s all part of the charm. Finding your seat (or standing spot) is like playing Tetris, but somehow, everyone manages to fit.
The first part of the ride is quite the rollercoaster—literally. The narrow mountain roads are winding, with sharp turns, steep drops, and occasional heart-stopping moments when you glance out the window and realize just how close you are to the edge. But fear not, these drivers know the roads well, and though it may seem chaotic, you’re in good hands. Just hold on to your seat (or the person next to you)!
About halfway through the journey, there’s usually a rest stop—this is your chance to stretch your legs, grab some snacks (try a local Mo:Mo or two!), and maybe even chat with some locals. When you finally arrive in Kathmandu, it’s time to relax, recover, and maybe treat yourself to a well-earned meal at one of the many great restaurants in Thamel. For us, it was a time to spend time with a family and tell them that we want spent all our life together.
Pro Tip: If you’re prone to motion sickness, make sure you have some medication handy—the winding roads can be a bit intense. Also, be prepared for a long ride; depending on the road conditions, the trip can take anywhere from 6 to 8 hours. Remember, the bus ride may be bumpy, but after tackling the Himalayas, a few potholes and sharp turns are no match for you!
Final words
This trek through Langtang and Gosaikunda isn't just for the hardcore trekkers. With some preparation, a dash of determination, and a good sense of adventure, anyone can experience the magic of these trails.
Before you hit the trail, here are a few tips from my experience: A steady pace will make the trek more enjoyable, and your lungs (and legs) will thank you later! Second, pack wisely but keep it light. You won’t need fancy outfits or heavy books in your backpack. Stick to the essentials like layers for warmth, a reliable rain jacket, and snacks—lots of snacks.
Lastly, embrace every step of the journey. You’ll have challenging days, unexpected weather, and moments where you might wonder why you signed up for this. But the rewards—whether it’s the serene beauty of Gosaikunda Lake, the majestic peaks of the Langtang Range, or the welcoming smiles of the locals—are beyond worth it. Plus, you’ll come back with some epic stories and a new appreciation for the Himalayas.
So, get ready, lace up those boots, and start planning. Your Langtang-Gosaikunda adventure awaits, and trust me, it’s a trek you’ll treasure forever!
Journey
Exploring life, culture, and nature in Nepal.
Inspire
Copyright © 2024 kchaworld. All rights reserved.